Oui, le titre est un peu « racoleur » mais c’est pourtant vrai !
J’avais pour habitude de générer mes certificats SSL/TLS (pour mes serveurs de courriels IMAP et SMTP, et aussi pour la partie administrative de ce présent blog) avec StartSSL, une des (la ?) seule compagnie qui proposait des certificats gratuits pour 1 an, et renouvelables.
Mais je suis dernièrement tombé sous le charme (initiative de la fondation linux) et la simplicité (processus entièrement automatisable à partir de la ligne de commande) de Let’s Encrypt.
Voici des instructions pour générer un certificat pour un site existant; elles sont issues de la documentation officielle et de mon expérience récente avec Let’s encrypt.
Contents
- 1 Mise à jour Août 2019
- 2 Installation du client letsencrypt
- 3 Génération de certificats sans arrêter Apache2, méthode webroot
- 4 Modification de votre VirtualHost Apache2 pour l’ajout HTTPS
- 5 Renouveler automatiquement votre certificat letsencrypt
- 6 Bonus : certificats Letsencrypts pour les courriels (SMTP et IMAP)
- 7 En conclusion
Mise à jour Août 2019
Il est maintenant recommander d’utiliser les paquets officiels de certbot plutôt que le repo git et letsencrypt-auto : pour cela, il suffit d’utiliser les instructions à : https://certbot.eff.org/
Concernant l’installation sous Ubuntu pour Apache2 en mode « j’édite mes fichiers de conf. Apache2 tout seul« , çà donne :
|
1 2 3 4 5 6 |
sudo apt-get update sudo apt-get install software-properties-common sudo add-apt-repository universe sudo add-apt-repository ppa:certbot/certbot sudo apt-get update sudo apt-get install certbot python-certbot-apache |
Ceci étant fait, pour invoquer certbot, on utilisera :
|
1 |
sudo certbot certonly --apache |
La magie de certboot sur Ubuntu 18, c’est qu’il ajoute automatiquement un timer :
|
1 2 |
systemctl list-timers Tue 2019-08-20 11:07:10 EDT 19h left Mon 2019-08-19 14:22:34 EDT 1h 11min ago certbot.timer certbot.service |
On peut vérifier le statut du timer :
|
1 2 3 4 5 6 7 8 9 10 11 |
systemctl status certbot ● certbot.service - Certbot Loaded: loaded (/lib/systemd/system/certbot.service; static; vendor preset: enabled) Active: inactive (dead) since Mon 2019-08-19 15:27:31 EDT; 6min ago Docs: file:///usr/share/doc/python-certbot-doc/html/index.html https://letsencrypt.readthedocs.io/en/latest/ Process: 6880 ExecStart=/usr/bin/certbot -q renew (code=exited, status=0/SUCCESS) Main PID: 6880 (code=exited, status=0/SUCCESS) août 19 15:27:28 poulca systemd[1]: Starting Certbot... août 19 15:27:31 poulca systemd[1]: Started Certbot. |
Et dormir sur ses 2 oreilles : un service certbot vérifiera tous les jours si des certificats doivent être renouvelés !
Installation du client letsencrypt
Rien de bien particulier : il suffit d’avoir auparavant installé git et python 2 sur sa machine et de cloner le repo git de letsencrypt :
|
1 2 3 |
$ git clone https://github.com/letsencrypt/letsencrypt $ cd letsencrypt $ ./letsencrypt-auto --help |
Vous devriez voir, si tout s’est bien passé la sortie suivante :
|
1 2 3 4 5 6 7 8 9 10 11 12 13 14 15 16 17 18 19 20 21 22 23 24 25 26 27 28 29 30 31 32 33 34 35 36 |
Updating letsencrypt and virtual environment dependencies...... Requesting root privileges to run with virtualenv: sudo /home/anthony/.local/share/letsencrypt/bin/letsencrypt --help [sudo] password for user: letsencrypt [SUBCOMMAND] [options] [-d domain] [-d domain] ... The Let's Encrypt agent can obtain and install HTTPS/TLS/SSL certificates. By default, it will attempt to use a webserver both for obtaining and installing the cert. Major SUBCOMMANDS are: (default) run Obtain & install a cert in your current webserver certonly Obtain cert, but do not install it (aka "auth") install Install a previously obtained cert in a server revoke Revoke a previously obtained certificate rollback Rollback server configuration changes made during install config_changes Show changes made to server config during installation plugins Display information about installed plugins Choice of server plugins for obtaining and installing cert: --apache Use the Apache plugin for authentication & installation --standalone Run a standalone webserver for authentication (nginx support is experimental, buggy, and not installed by default) --webroot Place files in a server's webroot folder for authentication OR use different plugins to obtain (authenticate) the cert and then install it: --authenticator standalone --installer apache More detailed help: -h, --help [topic] print this message, or detailed help on a topic; the available topics are: all, automation, paths, security, testing, or any of the subcommands or plugins (certonly, install, nginx, apache, standalone, webroot, etc) |
Génération de certificats sans arrêter Apache2, méthode webroot
Par défaut, letsencrypt permet de tout automatiser : la création du certificat et l’ajout du certificat à votre configuration Apache2 (ou Nginx d’ailleurs). Si vous ne voulez pas courir le risque d’abimer votre configuration accidentellement, je vous suggère d’utiliser le mode semi automatisé, webroot, qui va générer le certificat pour peu que vous lui indiquiez la racine des documents de votre site.
Par exemple, si le contenu de blog.dahanne.net est dans /var/www/blog.dahanne.net et que vous voulez que votre certificat couvre à la fois blog.dahanne.net et www.blog.dahanne.net :
|
1 |
$ ./letsencrypt-auto certonly --webroot -w /var/www/blog.dahanne.net/ -d www.blog.dahanne.net -d blog.dahanne.net |
Vous devriez obtenir en sortie :
|
1 2 3 4 5 6 7 8 9 10 11 12 |
Updating letsencrypt and virtual environment dependencies...... Requesting root privileges to run with virtualenv: sudo /home/anthony/.local/share/letsencrypt/bin/letsencrypt certonly --webroot -w /var/www/blog.dahanne.net/ -d blog.dahanne.net IMPORTANT NOTES: - Congratulations! Your certificate and chain have been saved at /etc/letsencrypt/live/blog.dahanne.net/fullchain.pem. Your cert will expire on 2016-04-10. To obtain a new version of the certificate in the future, simply run Let's Encrypt again. - If you like Let's Encrypt, please consider supporting our work by: Donating to ISRG / Let's Encrypt: https://letsencrypt.org/donate Donating to EFF: https://eff.org/donate-le |
et voilà ! vos certificats vous attendent dans /etc/letsencrypt/live/blog.dahanne.net :
|
1 2 |
$ ls /etc/letsencrypt/live/blog.dahanne.net/ cert.pem chain.pem fullchain.pem privkey.pem |
Modification de votre VirtualHost Apache2 pour l’ajout HTTPS
Encore une fois la documentation officielle est bien détaillée : vous pouvez modifier votre fichier de configuration de site Apache 2 (normalement sous /etc/apache2/sites-enabled/blog.dahanne.net) en le passant de :
|
1 2 3 4 5 6 7 8 9 10 11 12 13 |
<VirtualHost *:80> ServerAdmin valide@email.ca DocumentRoot /var/www/blog.dahanne.net ServerName blog.dahanne.net ErrorLog /var/log/apache2/blog.dahanne.net.error.log CustomLog /var/log/apache2/blog.dahanne.net.access.log combined <Directory /home/www/blog.dahanne.net> AllowOverride FileInfo AuthConfig Limit Options Options -Indexes MultiViews FollowSymLinks IncludesNoExec Order allow,deny Allow from all </Directory> </VirtualHost> |
à :
|
1 2 3 4 5 6 7 8 9 10 11 12 13 14 15 16 17 18 19 20 21 22 23 24 25 26 27 28 29 30 31 32 33 34 35 36 37 38 39 40 41 42 43 44 45 46 |
<VirtualHost *:80> ServerAdmin valide@email.ca DocumentRoot /var/www/blog.dahanne.net ServerName blog.dahanne.net ErrorLog /var/log/apache2/blog.dahanne.net.error.log CustomLog /var/log/apache2/blog.dahanne.net.access.log combined # optionnel, pour rediriger tout le trafic clair en chiffré #Redirect permanent / https://blog.dahanne.net/ <Directory /home/www/blog.dahanne.net> AllowOverride FileInfo AuthConfig Limit Options Options -Indexes MultiViews FollowSymLinks IncludesNoExec Order allow,deny Allow from all </Directory> </VirtualHost> <VirtualHost *:443> ServerAdmin valide@email.ca DocumentRoot /var/www/blog.dahanne.net ServerName blog.dahanne.net ErrorLog /var/log/apache2/blog.dahanne.net.error.log CustomLog /var/log/apache2/blog.dahanne.net.access.log combined <Directory /var/www/blog.dahanne.net> AllowOverride FileInfo AuthConfig Limit Options Options -Indexes MultiViews FollowSymLinks IncludesNoExec Order allow,deny Allow from all </Directory> SSLEngine On SSLProtocol all -SSLv2 SSLCipherSuite ALL:!ADH:!EXPORT:!SSLv2:RC4+RSA:+HIGH:+MEDIUM SSLProxyEngine On SSLCertificateKeyFile /etc/letsencrypt/live/blog.dahanne.net/privkey.pem # si apache2 < 2.4.8 SSLCertificateFile /etc/letsencrypt/live/blog.dahanne.net/cert.pem # si apache2 < 2.4.8 SSLCertificateChainFile /etc/letsencrypt/live/blog.dahanne.net/chain.pem # si apache2 > 2.4.8 # SSLCertificateFile /etc/letsencrypt/live/blog.dahanne.net/fullchain.pem </VirtualHost> |
Il vous suffit alors de recharger la configuration :
|
1 2 |
$ sudo service apache2 reload * Reloading web server config apache2 [ OK ] |
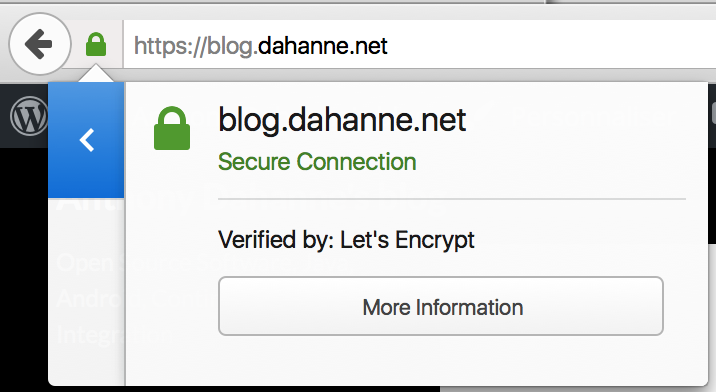
et de tester https://blog.dahanne.net
Vous paierez particulièrement attention à la validité du certificat, (un jolie cadenas vert)

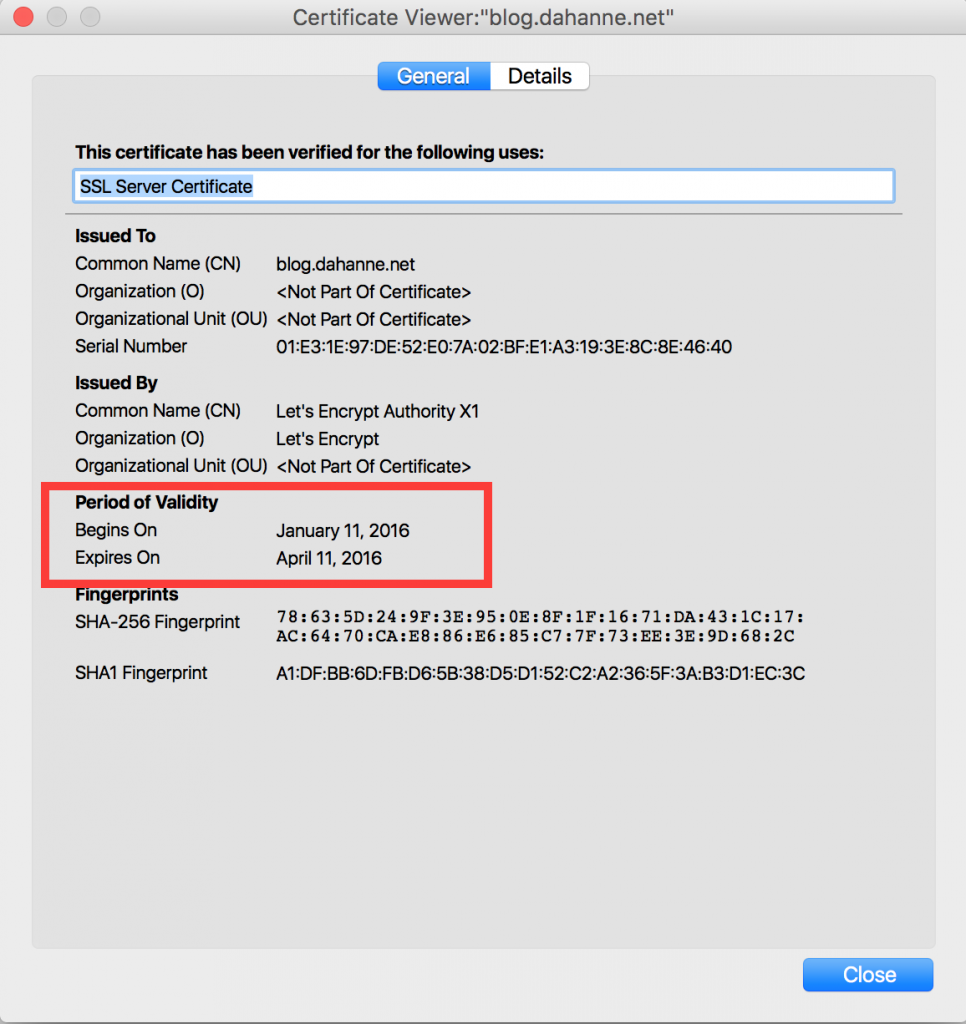
et aussi à sa date de péremption : dans 3 mois seulement !

3 mois, comparé à 1 an de StartSSL, c’est un peu court, mais n’ayez crainte ! un ajout dans la crontab et le renouvellement sera automatique !
Renouveler automatiquement votre certificat letsencrypt
Le certificat est valide 3 mois, mais pour être sûr de ne pas être en retard (et pour faciliter la tâche cron :-P) on va renouveler le certificat tous les mois.
Il suffit de rajouter dans /etc/cron.monthly/ un petit script shell :
|
1 |
$ sudo vim /etc/cron.monthly/letsencrypt.sh |
avec :
|
1 2 3 4 |
#!/bin/sh /home/anthony/letsencrypt/letsencrypt-auto certonly --webroot -w /var/www/blog.dahanne.net/ -d blog.dahanne.net --renew-by-default # ou sinon les certificats ne sont pas rechargés par le serveur web ! service apache2 reload |
C’est identique à la commande de création, avec un drapeau en plus, –renew-by-default
Bonus : certificats Letsencrypts pour les courriels (SMTP et IMAP)
Pour le smtp, avec postfix :
|
1 |
sudo vim /etc/postfix/main.cf |
|
1 2 |
smtpd_tls_cert_file = /etc/letsencrypt/live/blog.dahanne.net/fullchain.pem smtpd_tls_key_file = /etc/letsencrypt/live/blog.dahanne.net/privkey.pem |
Pour l’imap, avec dovecot :
|
1 |
sudo vim /etc/dovecot/conf.d/10-ssl.conf |
|
1 2 |
ssl_cert = </etc/letsencrypt/live/blog.dahanne.net/fullchain.pem ssl_key = </etc/letsencrypt/live/blog.dahanne.net/privkey.pem |
On peut recharger, et c’est fini !
|
1 2 |
sudo service dovecot restart sudo service postfix restart |
En conclusion
Le fait de pouvoir rajouter autant de certificats que l’on veut pour tous ses sous domaines, très simplement à partir de la ligne de commande constitue un fort avantage de Let’s Encrypt par rapport à d’autres solutions gratuites (et payantes !) : plus de processus manuels à travers son navigateur, de renouvellement avec certificat d’identité, etc.
Tellement facile à utiliser, qu’il n’y a plus d’excuses à utiliser de certificats auto généré, ou de connexions non chiffrées !
Une réflexion sur « HTTPS (certificats SSL/TLS) pour tous, gratuit et facile avec Let’s Encrypt ! »