UPDATE: You can also read the slides of the Lighting Talk given during Rejekts San Diego 2019
So you want to publish the Helm chart you’ve created and pushed the source to Github, and for a reason, you don’t want to or can’t publish them to the list of curated Helm charts ?
Follow this quick guide to automate the publication of Helm charts to your Github pages hosted Helm repository; we’ll use as an example the Terracotta (enterprise) Helm chart that is currently under development (the OSS Helm chart is already available from Helm Hub)
First things first : get your Helm chart ready for publication
You don’t have to, but it’s highly recommended to follow Helm charts best practices.
Once it’s done and once you can run helm lint successfully :
$ helm lint terracotta/
 ==> Linting terracotta/
 Lint OK 1 chart(s) linted, no failures
And you’re also able to install your helm chart from the source :
$ helm install terracotta/
Then you’re ready to share your Helm chart with the world, distributing it using a Helm repository
Hosting a Helm repository on Github Pages
Well, if you don’t want or can not make your Helm chart part of the curated Helm charts, can’t you use a dedicated software to host Helm charts ?
Sure you can, and you actually have few options : ChartMuseum is an open source Helm repository, but maybe you already run at your organization Artifactory and its Helm repository feature, or Nexus 3 and its Helm plugin or maybe you already have a subscription with Quay.io.
Actually, as long as you can
- run
helm package .(package the chart in a tarball) and then - run
helm repo index .(generate index.yaml, by the way, no need to have Tiller installed or even no need for a Kubernetes cluster running, the cli locally can execute those commands) and you can - put those files on a static webpage server such as Apache 2 or Ngninx,
you’re good !
That said, if your helm chart is already on Github, and you already have a Continuous Integration provider (your own Jenkins instance or the free Microsoft Azure Pipelines) then you’re just one script away to automate your Helm repository publication to the public facing Github pages !
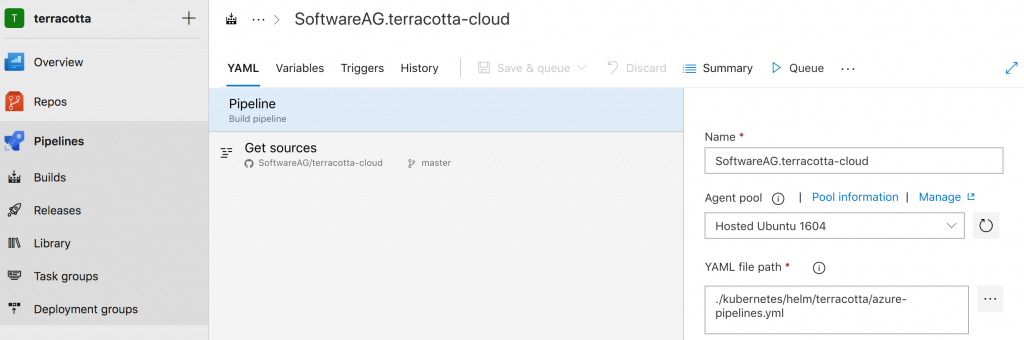
Using Azure Pipelines
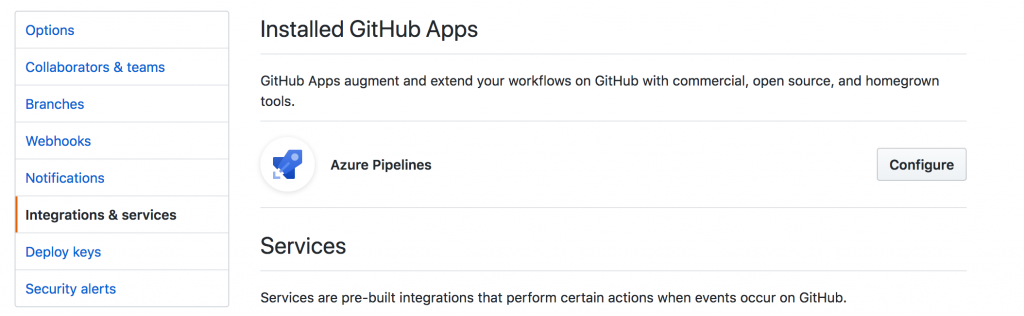
Once you have configured Azure pipelines to « watch » your Github repository to apply the tasks described in an azure-pipelines.yaml, then you just need to have this azure-pipelines.yaml file right!
Here are some explanations for this file (I’ll let the reader adapt for Jenkins or any other CI that can run Docker containers); special thanks to my colleague Alexander who helped me bootstrap this integration :
|
1 2 |
pool: vmImage: 'ubuntu-latest' |
We’ll be using an ubuntu based « worker »; so far so good.
|
1 2 3 4 5 6 7 |
steps: - task: YodLabs.VariableTasks.SetVariablesWithCredentials.SetVariablesWithCredentials@0 displayName: 'Github auth' inputs: ConnectionName: gh-push-tc-org userNameVarName: U passwordVarName: P |
First step is authentication to Github : that will allow the CI robot to commit and push to the Github pages branch; Azure pipeline needs to be configured in your Git repository « Settings » to have write access. The username and password provided are just shims.
|
1 2 3 4 5 6 7 8 9 10 |
- task: Docker@0 displayName: 'Generate helm package' inputs: containerRegistryType: 'Container Registry' action: 'Run an image' imageName: 'alpine/helm' volumes: | $(build.sourcesDirectory)/kubernetes/helm/terracotta:/apps containerCommand: 'package .' detached: false |
In this step, we’re running in a Docker container the command : helm package . in our chart directory (mounted via a volume), to generate the tarball that will contain our Helm chart.
We could have downloaded the helm cli and run directly the command as a bash command; but it was easier to use a container equipped with the helm cli. (Thanks Alexander for the idea)
|
1 2 3 4 5 6 7 8 9 10 |
- task: Docker@0 displayName: 'Download existing index.yaml' inputs: containerRegistryType: 'Container Registry' action: 'Run an image' imageName: 'alpine:latest' volumes: | $(build.sourcesDirectory)/kubernetes/helm/terracotta:/apps containerCommand: 'wget -P /apps/ https://softwareag.github.io/terracotta-cloud/index.yaml' detached: false |
In this step, we’re running in a Docker container the command : wget -P /apps/ https://softwareag.github.io/terracotta-cloud/index.yaml in our chart directory (mounted via a volume), to grab the latest version of the repository index
With this index, we’ll be able in the next step to add to this index the new chart (for example : if the chart version has changed, we want our repo to reference the new version as well as the old ones; if we don’t apply this step, the repo would only contain the latest chart … so much for continuity)
|
1 2 3 4 5 6 7 8 9 10 |
- task: Docker@0 displayName: 'Generate helm index.yaml' inputs: containerRegistryType: 'Container Registry' action: 'Run an image' imageName: 'alpine/helm' volumes: | $(build.sourcesDirectory)/kubernetes/helm/terracotta:/apps containerCommand: 'repo index --merge index.yaml .' detached: false |
In this step, we’re running in a Docker container the command : helm repo index . in our chart directory (mounted via a volume), to generate the index.yaml that will link to the tarball’ed Helm chart (and we use –merge to make sure we keep the references to the previous versions, in case the chart version changed)
|
1 2 3 4 5 6 7 8 9 10 11 12 13 14 15 16 17 18 |
- bash: | # setup Github Pages branch and repo to push to gh_url="https://$U:$P@github.com/SoftwareAG/terracotta-cloud.git" gh_branch=gh-pages gh_source="#${SYSTEM_PULLREQUEST_PULLREQUESTNUMBER}" # setup git username and email; auth was done in a previous task git config --local user.name "autogen" git config --local user.email "autogen-noreply@no-reply.softwareag.com" # only keep files that were generated previously : index.yaml and a .tgz archive mv $(build.sourcesDirectory)/kubernetes/helm/terracotta/*.* ./ git status git checkout -f gh-pages git add index.yaml *.tgz git status git commit -m "Update repository with latest helm chart from ${gh_source} ${COMMIT}" git push $gh_url $gh_branch displayName: 'Commit Helm Charts' |
Finally, it’s time to commit the changes and push them to Github pages.
The pages were configured to serve the branch gh_pages under the url : https://softwareag.github.io/terracotta-cloud/ ; but you could use your own DNS domain.
Make sure to tweak the look of your Helm repository using a README.md
An example of a successful build is available at the time of writing here.
Many thanks to my friend and colleague Akom for all his help with Azure Pipelines !